IMPORTANT NOTE:
Make sure you have already set up your OneDrive for Business storage before proceeding.
With Microsoft Office for Windows, you can save directly to OneDrive for Business after you set up just one application, such as Microsoft Word.
INITIAL SETUP
- Launch Microsoft Word.
- If a blank document does not immediately appear, select the Blank Document option.
- In the upper left, click the File tab.
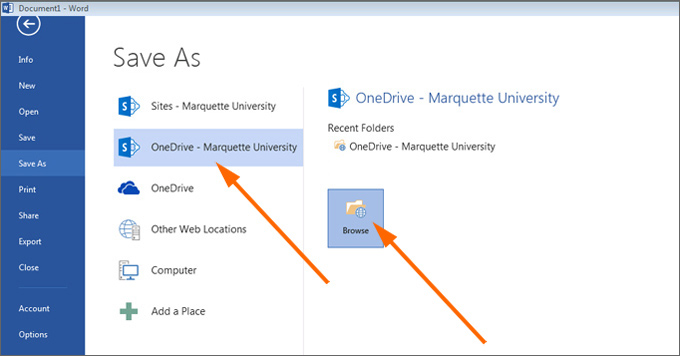
- A new screen appears. Click Save or Save As.
- Click One Drive - Marquette University. Click Browse.

- A "Save As" prompt appears. You can choose to save here or select a subfolder location for the file.
- Enter a file name and click Save.
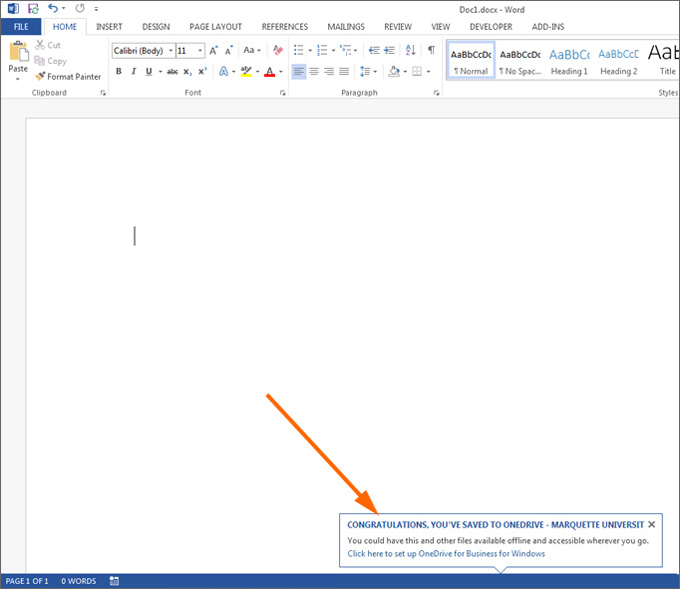
- Your blank Word file saves and you return to the Word document. Note that Microsoft Word displays a "congratulations" note.

- You now can access OneDrive from all of your Microsoft Office applications when saving files. See the subsequent use instructions below.
SUBSEQUENT USE OF ONEDRIVE FOR BUSINESS
- Launch a Microsoft Office application, such as Microsoft Word.
- Create a new file.
- In the upper left, click the File tab.
- A new screen appears. Click Save.
- Click One Drive - Marquette University. If you see "One Drive - Marquette University" among your Recent Folders, click that recent folder. Otherwise, click Browse.
- A "Save As" prompt appears. You can choose to save here or select a subfolder location for the file. Note: If the file should not be shared widely, do not save in the "Shared with Everyone" subfolder.
Click Save. - Your file saves to OneDrive for Business and returns you to the file for further editing.
- To keep saving the file to OneDrive for Business as changes are made, click the Save disk icon on the Quick Access Bar in the upper left.


